Creating a website with Symonfy 4: Part 2
In the previous post, we went over how to set up our Symfony 4 project, got a little taste of Twig and created our main home page controller. Today, we’re going to build off of last week’s tutorial and create a login and sign up system for our app! If you aren’t following along from the previous post, I highly recommend it if this is your first time working with Symfony 4. But, if you want to skip ahead to this one, feel free to download the starting source code here.
Installing New Libraries
In this part of the tutorial we’re going to start working with a database and forms. So we’re going to install some helpful libraries that will make our jobs easier. The main ones we’ll being installing are Doctrine, Forms, Security and Validation.
Doctrine is an ORM that makes working with a database really intuitive. It makes writing code that interacts with a database a lot nicer than writing regular queries. Doctrine essentially takes your database records and turns each into an entity or object. You’d update the entity’s properties like you would any other object. Then you can save it and Doctrine knows to create a query that saves the record in your database. Once we start working with it you’ll see more!
Symfony Forms is a library that lets you configure and build a form as an object in PHP and then display it in your view/template. It works with the validation library to handle any of the logic that goes into validating the input and spits out a Doctrine object that you can then save to your database!
Lastly, the security library handles all the user authentication processes.
So, to begin, make sure you’re in the root of your project’s directory and type the following:
composer require doctrine form security validation
Setting up our database
To setup your database, open the .env file in your project’s root directory. You should see a line towards the bottom that looks like this:
DATABASE_URL=mysql://db_user:[email protected]:3306/db_name
Change the db_user, db_password and db_name to the actual values of your username, password and database name. You don’t need to have the database created yet, but if you do that’s ok. Also, if your database isn’t running locally, change the 127.0.0.1 to the actual host of your database.
Next, if you haven’t already created the database, we can use Doctrine to create it for us. So in your terminal type the following:
php bin/console doctrine:database:create
You should get a message stating that the database was created! This is one of the many helpful command line commands that Doctrine comes with that help you work with your database. We will be using some more of them as we continue building our project.
Creating our User object
Next, we’ll create our user object. To do that, we’re going to run another command in our terminal. Type the following:
php bin/console make:user
You’ll then get a prompt asking a few questions. The first being, what to name your user class. We’re just going to call it User. Then it will ask if you want to store it in the database. Respond yes to that. Next it will ask what you want the unique display name to be called. This will be what the user would use as their username to login. Let’s go with email for this one. Then it will ask if our app needs to check the user’s password. Respond yes to this. Lastly, it will ask about which hashing algorithm to use. Depending on your version of PHP it will ask if you want to use the Argon2i algorithm. If your version supports it respond yes, otherwise respond no.
With that, our User entity has been created! If you look inside the src/Entity folder you’ll see the User.php file was created and a Doctrine entity is all set up for us. Open up the User.php file and we’ll go over it a little. Our User entity has 4 private properties, all with getters and setters.
The id, email and password are all pretty self explanatory. However, the $roles property we’ll talk a little bit about. We won’t be using it as much in this tutorial, but when building a more complicated web app you’ll likely use it more.
Roles are used as a way to authorize certain parts of an app. So for instance, say we wanted to have a User that had access to creating and managing users in our app. We might make an Admin role that can do this. But we also want to have users that can just login and ask questions. No managing of users. This might be a regular user role. You can call your roles anything, but generally they are prefixed with “ROLE_” and then a name of a role. Out of the box, our entity comes with the role, ROLE_USER. You can see that if you scroll down to the getRoles() method. It automatically adds this role to the value that’s returned.
The other file that was created is UserRepository.php inside the src/Repository folder. We use Repository classes to grab entities from the database. Once we start using them in our code we’ll discuss them more!
Next we need to actually create the table in our database that will hold our users. To do that we use Doctrine to create a migration. Of course, there’s a command line command we can run that will create one of those for us! So in your terminal type:
php bin/console make:migration
This will compare your current database to your current entities and generate the queries to make your database match your entities. Pretty cool!
Next we need to actually run the migration files. To do that type the following into your terminal:
php bin/console doctrine:migrations:migrate
It will ask you if you’re sure you want to continue, respond with y. Then if you take a look at your database, you should see the user table has been created with the properties in our User entity class.
Next we’ll go into creating a way for users to login and then a way for users to register.
Logging In
As with most things in Symfony, creating a way for our Users to login is already done for us. Type the following command into your terminal:
php bin/console make:auth
This will ask you what type of authentication you want to make. We’re going to go with Login form authenticator, so respond with 1. Next it will ask what to name your authenticator class. We’ll call ours LoginFormAuthenticator. Lastly, it will ask the name of the controller that our login form will be used in. We can use the default SecurityController. With that, our login system is set up!
If you look inside the Controller folder you’ll see a SecurityController.php file was created. In the login method it renders a new view that Symfony created for us. If we open the templates folder we’ll see the security folder was added with the login.html.twig file. The final thing that was autogenerated for us was the LoginFormAuthenticator.php file. That’s located in the src/Security folder. Open up that file and I’ll go over what it’s doing.
The first method you’ll see is the supports method. This is used by Symfony to tell if this authenticator class should be used. If you look at the code in that method, we haven’t gone over or used the Request object yet, but you might be able to tell what it’s doing:
public function supports(Request $request)
{
   return 'app_login' === $request->attributes->get('_route')
	   && $request->isMethod('POST');
}
It checks to see if the current route is named app_login and if the request method is POST. If those things are true, Symfony will assume that a user is trying to login.
Next is the getCredentials method. This method’s job is to return the credentials that a user is trying to use to login. So in this case, it’s taking the credentials from the POST request that was made and returns them as an array. It’s also setting a session variable for the last username used. This session variable is used in the event the login fails so the email field is prefilled for the user when they get the error message.
The next method is getUser. As you may have guessed, it’s job is to get the User entity that’s trying to login. The $credentials parameter that’s passed to this method is the same array that’s created in the getCredentials method. So first it’s checking that the csrf token passed is valid, then it tries to find a user by email. If it finds one, it returns that user object, otherwise an exception is thrown.
Next is checkCredentials. This is where the password is checked and should return either true or false.
Next is onAuthenticationSuccess. This method is called when the checkCredentials method returns true and the user has logged in successfully. Here we’re redirecting the user to another page. We can control this with some configuration. We’ll go into that later.
And the last method is getLoginUrl, which should return the login url.
A lot of the code used in each of these methods are Symfony specific, so you likely won’t fully understand how it all works just yet, but you should be able to have an idea of what each of the methods are doing by looking at the code inside.
If you remember when we created the authenticator in the terminal, the first question asked what type of authenticator we wanted. The first option was an empty authenticator. Had we chose that we would have had to code out most of the methods in this file. You may want to build your own authenticator if your building an api, which wouldn’t necessarily have a login form, just an endpoint that you pass the username and password to. But for our case, the pre-built Login Form Authenticator will work just fine!
Now, going back to the SecurityController. If you look at the annotation, you’ll see that the route was set up for us and it points to /login. So in your browser go to your site url and add a /login to it. Bam! Symfony has also created the actual login form for us as well. We could probably make it look a little nicer though. So if you’re comfortable with it, open the login.html.twig file and edit the form to look how you want. Just be sure to keep the input fields with their same names.
Here’s the code for my form if you want to copy mine:
{% extends 'base.html.twig' %}

{% block title %}Log in!{% endblock %}

{% block body %}
<div class="row">
   <div class="col-6 offset-3">
       <form method="post">
           {% if error %}
               <div class="alert alert-danger">{{ error.messageKey|trans(error.messageData, 'security') }}</div>
           {% endif %}

           <div class="card">
               <div class="card-body bg-light">
               <h1 class="h3 mb-3 font-weight-normal text-center">Log In</h1>
                   <div class="form-group">
                       <label for="inputEmail" class="sr-only">Email</label>
                       <input type="email" value="{{ last_username }}" name="email" id="inputEmail" class="form-control" placeholder="Email" required autofocus>
                   </div>

                   <div class="form-group">
                       <label for="inputPassword" class="sr-only">Password</label>
                       <input type="password" name="password" id="inputPassword" class="form-control" placeholder="Password" required>
                   </div>

                   <input type="hidden" name="_csrf_token"
                       value="{{ csrf_token('authenticate') }}"
                   >

                   {#
                       Uncomment this section and add a remember_me option below your firewall to activate remember me functionality.
                       See https://symfony.com/doc/current/security/remember_me.html

                       <div class="checkbox mb-3">
                           <label>
                               <input type="checkbox" name="_remember_me"> Remember me
                           </label>
                       </div>
                   #}

                   <button class="btn btn-lg btn-primary btn-block" type="submit">
                       Log in
                   </button>
               </div>
           </div>
       </form>
   </div>
</div>
{% endblock %}
I didn’t do too much and nothing involving Symfony. I just used some of the bootstrap classes to make the form a little neater.
Next let’s create a way to for users to sign up. We’ll come back to this and explain a little more how this login form works after we’ve done that!
User Sign Up
Guess what! Yes, Symfony has a pre-built registration form for us as well! So, in the terminal type the following:
php bin/console make:registration-form
It will ask about adding a UniqueEntity constraint to our User class to prevent duplicate accounts. Respond yes to this. Next it will ask if we want to automatically authenticate users after registration. Again, respond yes.
This will create a few new files for us. The first one we’ll look at is the RegistrationFormType class. You’ll find that in the src/Form folder. If you open it up, you’ll see it has two methods. A buildForm method and a configureOptions method. The buildForm method, builds the form object that will be displayed to the user. It also has any validation rules you may want to have. As you’ll see in the RegistrationFormType class, we’re checking that the password is not blank and that the length of the password is at least 6 characters.
Using the $builder parameter we call the add method, which adds fields to the form. The first parameter of the add method is the name of the field, the second is the type of field and the third is any kind of extra configuration you may need. So here it’s adding an email field, there’s no type so the default is a regular text field. Then we’re adding a field named plainPassword, which is a PasswordType field and there’s some additional configuration that adds validation.
We’ll be coming back to this class soon to make some modifications. But for now, let’s move on to the RegistrationController in the src/Controller folder.
Here it has a register method with a bunch of parameters. Inside the method it looks like it’s doing a lot. I’ll go through it pieces. The first three lines are:
$user = new User();
$form = $this->createForm(RegistrationFormType::class, $user);
$form->handleRequest($request);
We’re first instantiating a brand new User object. Then we’re creating a form using RegisterFormType class as the type of form. The createForm method comes from the AbstractController class that we’re extending our controller with. The first parameter it takes is a form type class. The second is an optional object. When the form is submitted, it will try to fill any fields it can on that object. So for instance, in our User entity, we have an email property and in our RegisterFormType class, we’re adding an email field. Our RegisterFormType class also has a plainPassword field, but the field in our User class is called password. It will not fill this field, for one since there is no plainPassword field on our User class, but also because in our RegisterFormType class, there’s some extra configuration that tells Symfony not to map it to the User class. If you go back to the RegisterFormType class real quick, you’ll see the plainPassword has an option which has mapped equal to false.
The last line, which calls the handleRequest method on the $form object essentially passes the request object to the form so it can read any POSTed values.
The next section is this big if statement:
if ($form->isSubmitted() && $form->isValid()) {
   // encode the plain password
   $user->setPassword(
	   $passwordEncoder->encodePassword(
		   $user,
		   $form->get('plainPassword')->getData()
	   )
   );

   $entityManager = $this->getDoctrine()->getManager();
   $entityManager->persist($user);
   $entityManager->flush();

   // do anything else you need here, like send an email

   return $guardHandler->authenticateUserAndHandleSuccess(
	   $user,
	   $request,
	   $authenticator,
	   'main' // firewall name in security.yaml
   );
}
Here it’s checking if the form was submitted and if it passed all validation checks. If that passes, it then assigns the password to the user object. It uses the $passwordEncoder object to encode the plainPassword that’s passed to us. We don’t need to set the email because that’s done for us automatically with the form object. Next is this bit of code:
$entityManager = $this->getDoctrine()->getManager();
$entityManager->persist($user);
$entityManager->flush();
This is how you save records to the database with Doctrine. Using an EntityManager object, you first call the persist method and pass it the entity you want to save. Then you call the flush method.
Next is this bit of code:
return $guardHandler->authenticateUserAndHandleSuccess(
   $user,
   $request,
   $authenticator,
   'main' // firewall name in security.yaml
);
This handles logging the user in after they’ve signed up. It takes the user object we created, the request object, the authenticator object and the firewall we’re authenticating for. In this case it’s the default firewall which is called main. You can have many firewalls within a Symfony app, but for this tutorial we’re just going to be sticking with the main one that comes with the default configuration.
Lastly we have the code that renders the template. It passes the registration form by calling the createView method, which actually builds the html that displays the form. It’s important to know, if you make any other forms, that the createView call needs to come after the isSubmitted and isValid calls so any validation errors are included when the form is rendered.
The last file that was created was the register template. So if you open the templates/registration folder, you’ll see the reigster.html.twig file inside. Here you should see something like this:
{% extends 'base.html.twig' %}

{% block title %}Register{% endblock %}

{% block body %}
   <h1>Register</h1>

   {{ form_start(registrationForm) }}
       {{ form_row(registrationForm.email) }}
       {{ form_row(registrationForm.plainPassword) }}

       <button class="btn">Register</button>
   {{ form_end(registrationForm) }}
{% endblock %}
Here its rendering out the form in pieces using Twig. form_start, outputs the <form> tag with the method set to post. The form_row methods output individual form fields with labels. The labels are generated based on the name of the field. The label for email becomes Email, plainPassword becomes Plain Password. You can control this when building the form inside the RegisterFormType class. Then lastly, the form_end method outputs the closing </form> tag.
If you open the controller back up, you’ll see there is a route set up for us. So let’s point our browsers to /register and see what this form looks like.

Not the nicest thing in the world. But there’s ways to fix this. We can update the template and wrap the form_rows around some bootstrap classes. But, there’s a better way to add bootstrap (if that’s what you want to do). Open the config/packages folder. Inside you should see a twig.yaml file. This is where you can do some extra configuration for Twig. When you open it, it should look something like this:
twig:
   default_path: '%kernel.project_dir%/templates'
   debug: '%kernel.debug%'
   strict_variables: '%kernel.debug%'
Just under the strict_variables property add the following bit of code:
form_themes: ['bootstrap_4_layout.html.twig']
Make sure it lines up with the other properties in this file so the end result should look like this:
twig:
   default_path: '%kernel.project_dir%/templates'
   debug: '%kernel.debug%'
   strict_variables: '%kernel.debug%'
   form_themes: ['bootstrap_4_layout.html.twig']
Now, refresh your register page.
Bam! Our form is looking nicer! Symfony comes with a bunch of themes we can use with our forms that format the fields differently. One of them being a theme that uses Bootstrap 4. Now, I want to make this look a little nicer. But first, you may or may not notice something about this register form. There’s no password confirmation field. This isn’t a requirement, but most registration forms have a field that forces the user to enter a password twice to make sure they entered what they meant to enter for their password. Let’s add that now!
Adding a Password Confirmation Field
To start, let’s open the RegisterFormType.php file in the src/Form folder. Now, we could add another PasswordType field, but there’s a better option. Symfony has a RepeatedType input field type, which essentially outputs a field twice and makes sure they are the same when submitted. So to start, let’s swap out PasswordType::class for RepeatedType::class. Then in the third parameter, that has the mapped and constraint keys, we need to add another key that tells Symfony what type of fields should be displayed. For that, we’ll pass it PasswordType::class. The key for that is type. To be sure, your code should look like this:
->add('plainPassword', RepeatedType::class, [
   // instead of being set onto the object directly,
   // this is read and encoded in the controller
   'type' => PasswordType::class,
   'mapped' => false,
   'constraints' => [
	   new NotBlank([
		   'message' => 'Please enter a password',
	   ]),
	   new Length([
		   'min' => 6,
		   'minMessage' => 'Your password should be at least {{ limit }} characters',
		   // max length allowed by Symfony for security reasons
		   'max' => 4096,
	   ]),
   ],
Also, be sure to add the following use statement to the top of your class so you can use the RepeatedType class:
use Symfony\Component\Form\Extension\Core\Type\RepeatedType;
Now, if you save and refresh your register page, you should see the Plain Password field is gone and there’s 2 fields, one labeled First and the other Second. Head back into your RegisterFormType class and we can change that. The keys we need to add to our configuration are first_options and second_options. Each of those takes an array of more configuration options. To set the label, you pass each of those keys an array with a label key that sets the label. That might sound a little confusing so here’s the code which should make more sense:
'first_options' => ['label' => 'Password'],
'second_options' => ['label' => 'Confirm Password']
Your full method should now look something like this:
$builder
	->add('email')
	->add('plainPassword', RepeatedType::class, [
	   // instead of being set onto the object directly,
	   // this is read and encoded in the controller
	   'type' => PasswordType::class,
	   'mapped' => false,
	   'constraints' => [
		   new NotBlank([
			   'message' => 'Please enter a password',
		   ]),
		   new Length([
			   'min' => 6,
			   'minMessage' => 'Your password should be at least {{ limit }} characters',
			   // max length allowed by Symfony for security reasons
			   'max' => 4096,
		   ]),
	   ],
	   'first_options' => ['label' => 'Password'],
	   'second_options' => ['label' => 'Confirm Password']
	])
	;
Save and refresh. Bam! We now have nicely labeled fields. The last thing we need to do with our form is add a validation message for when the password does not match the confirmation field. To do that, add another key to your passwordField configuration named invalid_message, and set it to “Your password does not match the confirmation”. Here’s what your configuration should look like after doing that:
->add('plainPassword', RepeatedType::class, [
   // instead of being set onto the object directly,
   // this is read and encoded in the controller
   'type' => PasswordType::class,
   'mapped' => false,
   'constraints' => [
	   new NotBlank([
		   'message' => 'Please enter a password',
	   ]),
	   new Length([
		   'min' => 6,
		   'minMessage' => 'Your password should be at least {{ limit }} characters',
		   // max length allowed by Symfony for security reasons
		   'max' => 4096,
	   ]),
   ],
   'first_options' => ['label' => 'Password'],
   'second_options' => ['label' => 'Confirm Password'],
   'invalid_message' => 'Your password does not match the confirmation.'
])
Email Validation
One other thing we should also do is use the EmailType::class as the type of field for our email field. That way if you try entering something that isn’t an email, it will spit back an error. To use the EmailType class, we need to add a use statement to the top of our class:
use Symfony\Component\Form\Extension\Core\Type\EmailType;
Then add EmailType::class as a second parameter when adding the email field. It will look like this:
->add('email', EmailType::class)
Next we need to actually add an Email constraint. If you look at the plainPassword field you can get an idea of how constraints are added. In the third parameter add an array with a constraints key. Then the constraints are just an array of Symfony Constraint objects. The one we’ll need for the email field is called… Email. To use it, we need to add a use statement to the top of our class:
use Symfony\Component\Validator\Constraints\Email;
Then add it to the constraints array just like how it’s done in the plainPassword constraints. Instantiate a new Email constraint object. You can set the message that displays by passing an array with a message key to the constructor of the Email object. Here’s my code but if you can add this on your own try that before looking at mine below:
->add('email', EmailType::class, [
   'constraints' => [
	   new Email(['message' => 'Please enter a valid email address.'])
   ]
])
Ok, that is all the configuration we need to do on our form. Lastly we can update it to look a little more like our login form. Since that’s regular old html, I’ll give you that code below. But if you want to do that yourself, feel free to edit the register.html.twig file however you’d like!
Here’s my register.html.twig file:
{% extends 'base.html.twig' %}

{% block title %}Register{% endblock %}

{% block body %}

   <div class="row">
       <div class="col-6 offset-3">

           <div class="card bg-light">
               <div class="card-body">
                   <h1 class="text-center">Register</h1>

                   {{ form_start(registrationForm) }}
                       {{ form_row(registrationForm.email) }}
                       {{ form_row(registrationForm.plainPassword) }}

                       <button class="btn btn-primary btn-block">Register</button>
                   {{ form_end(registrationForm) }}
               </div>
           </div>
       </div>
   </div>
{% endblock %}
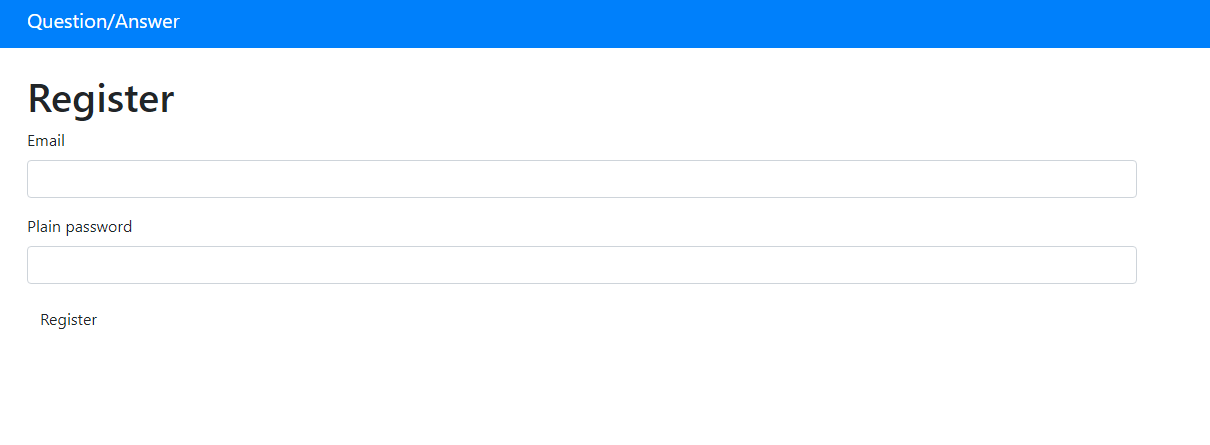
If your using my code, your register page should now look like this:

Great! Let’s try using this to register a new user! Fill out the form, you can try filling it out with too short of a password or a password that doesn’t match the confirmation to test out the validation. But ultimately enter valid data so that you can create a user.
And… an error. Something about a valid redirect. This is something we need to add to our LoginFormAuthenticator. So if you open that up, it’s in the src/Security folder. Then scroll down to the onAuthenticationSuccess method. Now if you look at the bottom of the method, you’ll see the exception that was just thrown. But above it, it gives an example of what we should put. So if you copy that example, and replace it with a route that exists, our register form will work. For now, let’s make it redirect to the homepage when you login. So change “some_route” for “main”.
Here’s what your onAuthenticationSuccess method should look like after that update:
public function onAuthenticationSuccess(Request $request, TokenInterface $token, $providerKey)
{
   if ($targetPath = $this->getTargetPath($request->getSession(), $providerKey)) {
	   return new RedirectResponse($targetPath);
   }


   return new RedirectResponse($this->urlGenerator->generate('main'));
}
Now let’s go back to the /register page and try registering a new user. After registering, it should redirect to the homepage. Now, you technically are logged in. To see that quickly, let’s install another special Symfony package. In your terminal, type the following:
composer require debug --dev
This will install a bunch of helpful debug tools, one being a web profiler. Once it’s finished installing, refresh your page and you should now have a bar on the bottom of your site with a bunch of stats. One of those items at the bottom will be a little icon of a person, with the email you used to register your user!
Now, one thing you may notice is that you can keep going back to the register page and registering new users. In most cases, you want to prevent people who are logged in from accessing the register and login pages. Let’s do that next!
Granting and Preventing Access
To start, let’s open the RegistrationController. There’s a method that’s included with the AbstractController class called isGranted. This can check the currently logged in user’s role and decide if they should have access. You can also pass in special keywords that check if a user is simply logged in. We’re going to use that to prevent access to the register and login routes for users who are logged in. So, if we check if the user is logged in, and they are, we’re going to redirect to the homepage.
The special keyword to check if a user is logged in is “IS_AUTHENTICATED_FULLY”
To redirect someone, you use another method that comes from the AbstractController class called redirectToRoute. The first parameter it takes is either a route path or a route name. So with that information, try to write the code that checks to see if a user is logged in, and then redirect to the homepage if they are.
Here’s my code if you’re unsure or get stuck:
if($this->isGranted("IS_AUTHENTICATED_FULLY"))
{
   return $this->redirectToRoute("main");
}
We’ll want to add this to the top of both the register (RegistrationController) and login (SecurityController) methods.
Once that’s added, you won’t be able to go to either /register or /login after you’re already logged in.
We have one final thing to do. Logout!
Logging out
Creating a way to log out is really easy with Symfony. No, there isn’t a command this time though. But we just need to update some configuration files and we’re set.
In the config folder, open the routes.yaml file. In here we can actually define all our routes if you didn’t want to define them in annotations. You can follow the example that’s commented out if you want to test it out.
But for now, we’re going to add a logout route here. We’re not creating a method in a controller with an annotation like we normally do because we don’t actually need to with Symfony’s Security package. There just needs to be a route in the system.
We’ll call the route app_logout and then set the path to /logout. The name of the route is the main key and then you set the path as a sub-key in the yaml file. Again, if you look at the commented out example you can probably get an idea. In the example, index is the name of the route and path is assiged to /. We don’t need to add a controller key in this instance however.
So your routes.yaml file should look something like this once you add the app_logout route:
#index:
#    path: /
#    controller: App\Controller\DefaultController::index
app_logout:
   path: /logout
Next, open the config/packages folder and find the security.yaml file. This is where you’d make any additional configuration to your security system. A lot of it is set up for us by using Symfony’s helper commands so we don’t need to do too much to it if we’re building something simple.
But, we do need to configure the route for logging out. To do that under the firewalls > main section, add another key called logout, then under that section add a path key and assign it to app_logout. Here’s what your firewalls section should look like after adding that:
firewalls:
   dev:
	   pattern: ^/(_(profiler|wdt)|css|images|js)/
	   security: false
   main:
	   anonymous: true
	   guard:
		   authenticators:
			   - App\Security\LoginFormAuthenticator
	   logout:
		   path: app_logout
Once that’s saved, go to /logout in your browser and you’ll be taken to the homepage. You should see your little user icon now says “anon” next it. We’re logged out! If you hover over it, it will still show Authenticated as being true. But that’s because in Symfony, technically all users visiting your site are authenticated in some way.
You should now be able to visit the /register and /login routes now without being redirected. Let’s test out our login page since we haven’t done so yet.
Testing out Logging in
First try logging in with a wrong password. You should get an error message. If you open the SecurityController, you’ll see there’s an $error variable that’s generated from the $authenticationUtils object. It grabs the last authentication error, which is determined by our LoginFormAuthenticator. Inside the login.html.twig template, you’ll see we check if there are any errors with an if statement. If there is an error, its outputting the error.messageKey. The messageKey is passed through the translation filter, which is what |trans(error.messageData, ‘security’) is doing.
Now that we know a little more about how it’s displaying an error when you login with incorrect credentials, let’s test it with real credentials. If everything is set up correctly, you should be taken to the home page and our profiler toolbar should show the email you used to login!
We’ve done a lot in this part. We’ve setup our database. We built out a login and register system (though Symfony does a lot of the heavy lifting for us). And we customized some of the validation on our register form. In the next part we’ll get to actually creating the main function of our app, which is asking and answering questions! If you have any questions about this part of the tutorial or Symfony in general, feel free to leave a comment below!
Click here to view the next part!