Want to start working with API’s and making ajax calls in your react apps? This tutorial will help get you started with using the Fetch API to do just that. It’s expected that you’ve done a few React tutorials before going through this one, but if you haven’t thats okay! I will explain everything as I go. But you should at least have create-react-app installed before starting.
What will we be making?
We will be using the Dog API from dog.ceo to pull random dog images to display on a web page. Simple, but hopefully it will get you comfortable making Ajax calls in your React App using the Fetch API.
Step 1. Create the base app
Navigate to your working directory from your console and type:
create-react-app dog
Once it’s finished setting up the base app, navigate inside the dog directory and type:
npm start
That will load up the React starter page.
Step 2. Clear out the base code
Go into App.js. If you look in the render function, you will see the code that makes up the React starter page. Since we won’t be using any of it, we will clear it out. Remove everything except for the outer div element. Your render function should now look like this:
render() {
    return (
        <div className="App">

        </div>
    );
}
After that, you can delete everything from App.css so it’s an empty file.
Step 3. Defining the state
The state object in this project is going to be relatively simple since our app will mainly be just displaying an image. Our state object will have one property to store the image url that we pull from the Dog API. We will also have a property that lets us know if an image is loading or not. So with that, our initial state object will look something like this:
{
    image: null,
    imageLoading: false
}
There are a few ways to define the initial state in a React app. I like to define it in the constructor function. Here is the code:
constructor(props) {
    super(props);
    this.state = {
        image: null,
        imageLoading: false
    }
}
Every constructor in a react app takes in a props parameter. The first line in the constructor: super(props);
Runs any code from the parent class that our class is extending. In this case our App class is extending Component, which is a class that is part of React. You can see how it is available to us from the first line in the App.js file:
import React, { Component } from 'react';
That line essentially pulls in different modules from the react codebase.
The next few lines after the call to super is us setting up the initial state.
Step 4. Build out the HTML
Up to this point, we’ve defined the state and have essentially an empty render function. Now it’s time to actually design how our app will look. In our case, we are displaying an image of a doggo and a button that will let us pull a new dog image from the api. We also need some kind of indicator that will show while we are fetching the new image. If you’ve already done a few react projects, try to write this part out on your own without looking at my code below. It will help you learn a lot more by doing it yourself. If this is one of the first tutorials you are doing or if you’re stuck, then take a look at the code below:
<div className="App">
    {this.state.image ? (<img src={this.state.image} className="dog-image" />) : ""}
    {
        this.state.imageLoading ?
        (
            <p>
                <strong>
                    Loading...
                </strong>
            </p>
        )
        :
        ""
    }
    <button type="button">Get New Random Image</button>
</div>
Here’s a breakdown of each section:
{this.state.image ? (<img src={this.state.image} className="dog-image" />) : ""}
This line decides whether or not to show the image. The first bit of code: “this.state.image” is a condition, meaning, if this.state.image has a value, it will either output the code directly after the ? or if it doesn’t have a value, it will output the code directly after the :. I gave the image a className so we can style it later on.
Whenever you want to output HTML or other React components in a condition like this, you need to wrap it in parenthesis. And just like the overall render function, it needs to return either a single element, or if you need to show multiple elements, they need to be wrapped in a parent element. So, if for instance I wanted to show the image with a link underneath to the source of the file, here is how that would look:
{this.state.image ? (<div><img src={this.state.image} className="dog-image" /><br /><a href={this.state.image}>Source</a></div>) : ""}
Notice that the “img” element and “a” element are grouped together within a div element. Without the outer div, React will output errors. Sidenote, you can also use a Fragment component instead of a div. A Fragment component is part of React. You can use it by importing Fragment as you do with the Component class at the top of the file, or you can use it like <React.Fragment>. When rendered, the contents inside the Fragment will show, but the actual Fragment tag will not be visible.
The next snippet:
{
    this.state.imageLoading ?
    (
        <p>
            <strong>
                Loading...
            </strong>
        </p>
    )
    :
    ""
}
Is similar to the previous bit of code that shows the image, though I’ve spaced it out a little more so it’s easier to read. This code says “is the image loading?” If yes, show some text that says Loading. If it’s not loading, then show nothing.
And the final bit of code:
<button type="button">Get New Random Image</button>
Is simply a button that will let us get a new random dog image. In the next few steps we will build out a function that will handle actually fetching a new random image.
Step 5: Making the Ajax calls
We’ve defined our state and built out how its going to look, now we need to actually pull the images from the API!
To do that we will be using the Javascript Fetch API. It’s a built in method of making ajax calls. You can read more about it here.
The main thing you need to know is that to make a basic ajax call using fetch, you would write:
fetch(url_to_api_here).then(function(response) {
    return response.json();
})
.then(function(jsonData) {
    // success!
})
.catch(function(err) {
    // error!
});
To start, I’ll explain what this is doing and then we will move on to actually using it in our app. The first line makes an ajax call to the url we supply in the first parameter and returns a promise. If all goes well, it passes a response to the first then block. The response object has a few methods but the one we will be using is json(). So we return the result of response.json() and again if all goes well, it will move to the second then block. Here, we can actually access the jsonData like an object. So if our jsonData has a message property, we would be able to access it like jsonData.message.
The catch block at the end is used in the event that any errors occur at any point.
Now that you’ve seen what fetch looks like, we’ll use it for real.
The URL to get us a random dog image is: https://dog.ceo/api/breeds/image/random.
By looking at the previous example, we will replace “url_to_api_here” with the one above. The rest will mostly be the same. We will wrap it in a function so it’s reusable, and update the state in certain parts. Before we call fetch, we need to update the imageLoading state to true since we will need to wait for a response once fetch is called. When the ajax call is successful and reaches the second then block, we’ll re-update the state so imageLoading is false and we will update the image property to the url of the image that’s returned from the API. With the Dog API, a successful response looks like this:
{
    status: "success",
    message: "url_to_image"
}
So to access the url in the second then block, you would write: jsonData.message.
With all of that information, like in the last step, if you have already done a few React tutorials, try writing the above part on your own. If this is your first tutorial, or get stuck then take a look at the code below:
getRandomDogImage() {
    this.setState({
        imageLoading: true
    });

    let self = this;

    fetch("https://dog.ceo/api/breeds/image/random").then(function(response) {
        return response.json();
    })
    .then(function(jsonData) {
        self.setState({
            image: jsonData.message,
            imageLoading: false
        });
    })
    .catch(function(err) {
        self.setState({
            imageLoading: false
        });
    });

}
So I decided to call this function “getRandomDogImage” as you can see by the first line. The next bit of code:
this.setState({
    imageLoading: true
});
Sets the state to true. As a reminder, in React if you want to update the state you must update it through the setState method. setState is a method that’s built into React, it’s not something you need to define yourself.
The next line of code: let self = this; allows us to access the setState function while inside the fetch function. If you use arrow functions instead of the classic way of writing functions, you will not have to use that line. I decided against arrow functions for this tutorial to make the code a little easier to read for beginners. If you’re comfortable using them feel free to! If you have no idea what I’m talking about, that’s ok! For this tutorial you don’t need to worry about it.
The next bit of code is the fetch function being used to grab the random dog image. It’s mostly the same as the original example, except this time, we are actually doing something in the second then block and catch blocks.
In the second then block, we are updating the imageLoading state back to false and setting the image state to jsonData.message, which holds the image URL.
In the catch block, normally we would do a little more error reporting, like maybe showing a message, but for the sake of simplicity, we will just update the imageLoading state to false. Remember, we set it to true at the beginning of the function, so if an error occurs, the loading message would continue to show if we don’t update it back to false.
Now that we have a function that makes the ajax call, we need to make it so when clicking on the “Get New Random Image” button calls that function. To do that we need to do two things. The first thing we will do is add an onClick attribute to the button and assign it the getRandomDogImage function. Our button in the render function would now look like this:
<button type="button" onClick={this.getRandomDogImage}>Get New Random Image</button>
However, if you actually click the button, an error is going to show. That’s because we need to bind the getRandomDogImage function to this class. To do that we need to modify the constructor function. In order to bind the function to the class you need to add this bit of code towards the end your constructor:
this.getRandomDogImage = this.getRandomDogImage.bind(this);
What this essentially does, is say “Hey getRandomDogImage, when I use the keyword this inside you, I mean this instance of the class”. If that’s kind of confusing, just know that adding the above bit of code lets you use this in the getRandomDogImage function without an error occurring.
So you entire constructor function should now look like this:
constructor(props) {
    super(props);
    this.state = {
        image: null,
        imageLoading: false,
    }

    this.getRandomDogImage = this.getRandomDogImage.bind(this);
}
Now when you click the button it will show a random dog image!
Step 6: Auto showing an image
Currently our app initially shows a button, and waits for you to click the button before showing a picture. We want to show an image right from the start. To do that, we are going to use another built in React method called componentDidMount. This method is essentially called once the component mounts on the page. Any state changes you make in componentDidMount will be what the user initially sees. You can learn more about this method here: https://reactjs.org/docs/react-component.html#componentdidmount
Since we made the getRandomDogImage method in the last step, this step is going to be relatively easy. We will add a componentDidMount method to our App class and inside, we’ll call the getRandomDogImage method.
Our code will look like this:
componentDidMount() {
    this.getRandomDogImage();
}
Once you save, your page should update and you will now see an image appear right from the start!
Step 7: Styling our App
We’ve got the meat of our app out of the way, the final step is to make it look somewhat pretty. Currently our app looks like this:
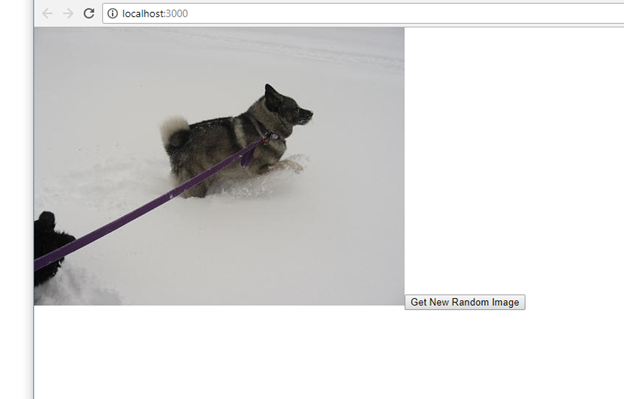
Not much to look at right? Since there isn’t much to our app, there isn’t a lot of styling we need to do. But we can maybe center the image and button. And also make the button look nicer. If you are comfortable with CSS, feel free to make any other adjustments you’d like in this step as well.
Here’s what I came up with for the CSS:
.App {
    position: relative;
    margin-top: 20px;
    margin-left: auto;
    margin-right: auto;
    width: 50%;
    text-align: center;
}

.App .dog-image {
    display: block;
    margin-left: auto;
    margin-right: auto;
    margin-bottom: 30px;
    max-width: 100%;
}


.App button {
    background-color: #0080ff;
    padding: 10px 18px;
    color: white;
    font-size: 16px;
    font-weight: bold;
    border: 0px;
    border-radius: 3px;
    box-shadow: 0px 0px 5px 0px rgba(0,0,0,.25);
}

.App button:hover {
    background-color: #0071e0;
    cursor: pointer;
}
The first class .App, essentially centers the content on the page. That’s mainly done through the text-align: center. Though making the position relative and setting the left and right margin to auto, also centers the App container as a whole.
The .dog-image class makes sure that the image will appear on it’s own line, by setting the display to block. It centers the image by setting the left and right margins to auto and we add a bit of space below it by setting the bottom margin to 30px. And finally, we make sure that it will not go beyond its container by setting the max-width to 100%.
The next set of css styles the button. We make the background color a bluish color, add padding so it doesn’t look too squished and set the font color to white. Next we make the font a little larger and bold. We remove the border by setting it to 0px and give it rounded borders by setting the border-radius to 3px. The box-shadow line gives it a slight shadow. Lastly, when someone goes to click or hover over the button, we want to show a pointer or hand looking cursor and also have the color go a little darker blue.
The final product should look like this:
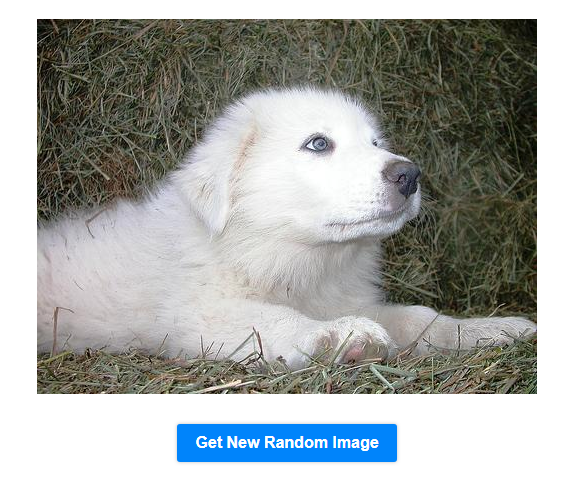
And that’s it! You’ve made a React app that makes an ajax call. There’s a lot more you can do with the Fetch API. This tutorial only really scratches the surface, but hopefully you got your feet wet enough and are able to try some new things on your own. If you enjoyed this tutorial, have any questions or feedback feel free to let me know in the comments below!
Want to take things to the next level? Check out Part 2 where we work on making more ajax calls, including POST and DELETE requests.