Generally, when you’re working on medium to large scale Vue applications, you’re going to be making ajax calls to a backend api service to pull data for your frontend app. To do that, you’ll need to make ajax calls. In this tutorial, we’ll go through a quick example of how to get started with axios, a javascript library that helps to make ajax calls.
Prerequisites
- Basic understanding of Vue.js
- vue-cli installed
What will we be making?
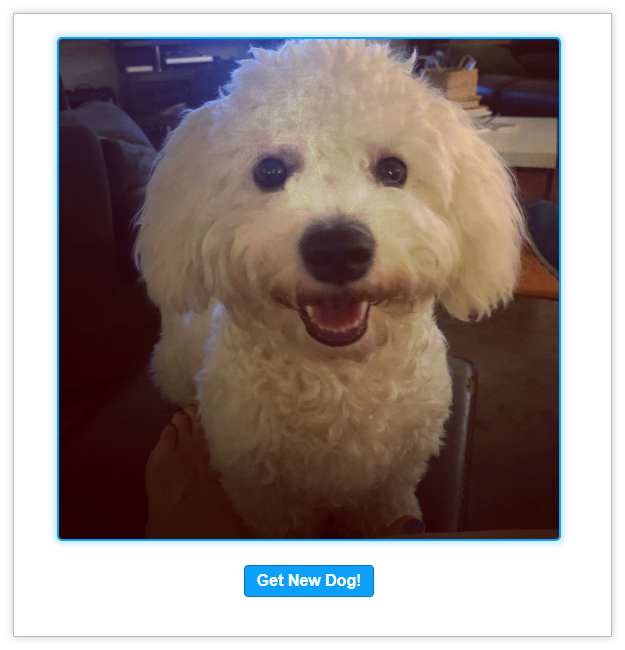
We’ll be using the dog.ceo api to grab a random picture of a dog to display in our app. It’s simple, but hopefully it will get you comfortable with making ajax calls using axios inside your Vue app.
Project Setup
To start, create your base project with the following command:
vue create dog-ajax
Once it’s done, follow the instructions in the terminal to launch your app in a browser.
Next, we’ll clear out a lot of the boilerplate code that vue-cli gives us with the starter app. In the App.vue file clear out the template and style sections. You can also clear out the object in the script section, leaving it exporting an empty object like so:
<script>
export default {

}
</script>
Lastly, we can delete the components and assets folders as we won’t need them.
Install Axios
Now that we have our project setup, let’s install axios! It’s pretty easy. While inside your project’s directory, in a terminal type the following command:
npm install axios --save
This will install axios and save an entry to your package.json. When it’s finished installing move on to the next section.
Setting up a default state
We’ll need some default state for our app before we start using axios. Otherwise we can make an ajax call, but we technically won’t be able to show it correctly in our template.
If you think about what our app is doing, showing an image and a button, the state shouldn’t be too complicated. We mainly need a state variable that holds the image url. It would also be helpful to know if there is an existing ajax request being made. So with that, try to write out the state object on your own. If you need help or are finished, take a look at my code below:
<script>
export default {
   data() {
       return {
           isLoading: false,
           imageUrl: ""
       }
   }
</script>
We have an imageUrl property for the image and an isLoading to tell us if we are still waiting on a request to finish.
Template & Style
The template for this app won’t be too complicated. We’re mainly try to get experience with axios. The template can be up to you, as long as you have an image that’s bound to the imageUrl property and a button that will be used to initiate the ajax request, you’re fine. If you want you can use my template and style code below:
<template>
    <div class="container">
        <img :src="imageUrl" v-if="imageUrl">
        <br>
        <buttom :disabled="isLoading">
            <template v-if="!isLoading">
                Get New Dog!
            </template>
            <template v-else>
                Loading...
            </template>
        </button>
    </div>
</template>

<style>
    body {
        padding: 20px;
    }

    .container {
        width: 90%;
        margin: auto;
        text-align: center;
    }

    img {
        display: inline-block;
        max-width: 500px;
        border: solid #009dff 2px;
        border-radius: 5px;
        box-shadow: 0px 0px 10px 3px rgb(0, 157, 255, .25);
    }

    button {
        background-color: #009dff;
        color: white;
        border-radius: 4px;
        border: solid #0072b9 1px;
        padding: 6px 12px;
        font-size: 16px;
        font-weight: 700;
        margin-top: 20px;
        cursor: pointer;
        transition: all .2s;
    }

    button:hover {
        background-color: #0186da;
    }

</style>
Here, like I said above, I have an image and a button. I added some css to style the page a little as well. I’m using the isLoading property to disable the button so multiple requests can’t be made at the same time. I’m also showing a different message on the button when the image is loading.
Using Axios
Now that we have our template setup, we can start working with axios! We need to add a method that will use axios to make an ajax call. To make a GET request with axios the syntax is the following:
axios.get(API_URL).then(response => {
   let data = response.data;
});
When using axios, it will automatically format any json that’s returned and add it to the data property of the response object.
In our app, we’ll be using https://dog.ceo/api/breeds/image/random as the api endpoint to get our random dog image. That endpoint returns an object with a message property that holds the image url. Here’s an example response object:
{
  "status": "success",
  "message": "https://images.dog.ceo/breeds/poodle-standard/n02113799_1140.jpg"
}
So now that you know how to use axios to make a GET request and you know what the response object looks like when making a call to the dog api, try writing a method that will pull a new dog image. It should update the imageUrl property after the call is complete.
If you need help take a look at my code below:
methods: {
   getNewDog() {
	   this.isLoading = true;
	   axios.get("https://dog.ceo/api/breeds/image/random").then(response => {
		   this.imageUrl = response.data.message;
		   this.isLoading = false;
	   })
	   .catch(err => {
		   // Error occurred - set loading to false
		   this.isLoading = false;
	   });
   }
}
Here, I’m first setting the isLoading property to true before I make the ajax call to show that the app is working on getting a new image. Then I make the ajax call. If it’s successful, I’m setting the imageUrl to the new image and I’m setting isLoading back to false. If there’s an error, which shouldn’t happen in our case, I’m setting the isLoading property back to false so the app doesn’t get stuck with a loading message.
Next we need to connect this method up to the Get New Dog button. Make the following adjustment to the button in your template if you’re unsure of how to do that:
<button @click="getNewDog" :disabled="isLoading">
And that’s mostly it. You should now be able to go to the app in your browser and click the Get New Dog button to load a new image of a dog. Great!
One more thing that would be nice is to have an image load when the page loads. Currently we have to click the button in order to get our first image. That’s fixed with a lifecycle hook. If you’re unsure of what those are, go here for a more in-depth explanation.
By adding a beforeMount method to our Vue object (outside of the methods object), we can call getNewDog so when our app loads, it will load a new picture!
Here’s the code for that:
beforeMount() {
   this.getNewDog();
}
And we’re done! If you got stuck at any point, here is the full code for the app:
<template>
   <div class="container">
       <img :src="imageUrl" v-if="imageUrl">
       <br>
       <button @click="getNewDog" :disabled="isLoading">
           <template v-if="!isLoading">
               Get New Dog!
           </template>
           <template v-else>
               Loading...
           </template>
       </button>
   </div>
</template>

<script>

import axios from 'axios';

export default {
   data() {
       return {
           isLoading: false,
           imageUrl: ""
       }
   },
   methods: {
       getNewDog() {
           this.isLoading = true;
           axios.get("https://dog.ceo/api/breeds/image/random").then(response => {
               this.imageUrl = response.data.message;
               this.isLoading = false;
           })
           .catch(err => {
               // Error occurred - set loading to false
               this.isLoading = false;
           });
       }
   },
   beforeMount() {
       this.getNewDog();
   }
}
</script>

<style>
   body {
       padding: 20px;
   }

   .container {
       width: 90%;
       margin: auto;
       text-align: center;
   }

   img {
       display: inline-block;
       max-width: 500px;
       border: solid #009dff 2px;
       border-radius: 5px;
       box-shadow: 0px 0px 10px 3px rgb(0, 157, 255, .25);
   }

   button {
       background-color: #009dff;
       color: white;
       border-radius: 4px;
       border: solid #0072b9 1px;
       padding: 6px 12px;
       font-size: 16px;
       font-weight: 700;
       margin-top: 20px;
       cursor: pointer;
       transition: all .2s;
   }

   button:hover {
       background-color: #0186da;
   }

</style>
Compare this to what you have and you should be able to solve any problems.
If you have any other questions, feel free to leave a comment below!