Creating a website with Symonfy 4: Part 4
This post is part of a series where we’ve been building a Question/Answer web app. So far we have our login system built and the ability to ask a question. Today we’ll be updating our homepage to pull questions from the database, we’ll add the ability to answer questions, update our menu and add a way to track views on a question. If you haven’t been following from the start, you can download the code up to this point here. With that said, let’s get started!
Updating our Menu
To get the easy stuff out of the way, let’s update our menu with a link to Ask a Question. In our templates/base.html.twig file, we’re going to add the link so it only shows when someone is logged in. Try adding it without looking at my updated code below. If you’re not sure though, here’s my updated menu code:
<ul class="navbar-nav ml-auto">
   {% if app.user %}
	   <li class="nav-item">
		   <a class="nav-link" href="{{ path('app_question_ask') }}">Ask a Question</a>
	   </li>
	   <li class="nav-item">
		   <a class="nav-link" href="{{ path('app_logout') }}">Log Out</a>
	   </li>
   {% else %}
	   <li class="nav-item">
		   <a class="nav-link" href="{{ path('app_login') }}">Log In</a>
	   </li>
	   <li class="nav-item">
		   <a class="nav-link" href="{{ path('app_register') }}">Sign Up</a>
	   </li>
   {% endif %}
</ul>
If you refresh your page and if you’re logged in, you should now see the Ask a Question link.
Displaying Questions
So far we’ve only pulled one question at a time like we did in the index function of our QuestionController. For the homepage, we want to show all of the questions. To do that we’ll need to use our QuestionRepository class. If you remember, this was auto-generated when we created our Question entity. To start, let’s open up our MainController.php file and add it to the index function there. In order to use the QuestionRepository we need to add a parameter to the index function and type hint it as a QuestionRepository object. This is how that would look:
public function index(QuestionRepository $questionRepository)
This is called dependency injection. Symfony will automatically create a QuestionRepository object for us and pass it to us through this parameter.
Be sure to also add this use statement to the top of your file so we can use the QuestionRepository class without using the whole namespace:
use App\Repository\QuestionRepository;
Now that we have a QuestionRepository object, we can use it to pull Question entities/records from the database. The method we’ll use for that is findBy. findBy has 4 parameters, though they’re all optional. The first is an array of criteria. This is how you can filter out specific questions. If you’re used to writing sql, this is essentially setting up the WHERE clause of your query.
The second parameter is an array and is where we set the order. So if we wanted to sort by the new questions first, we would give it [‘created’ => ‘DESC’]. To sort by oldest first we’d give it [‘created’ => ‘ASC’].
The next two are the limit and the offset and should be integers.
For our app, we’re only really going to use the second parameter to order by the newest questions first. So to do that you would pass an empty array to the first parameter and then pass [‘created’ => ‘DESC’] to the second. Here’s what that looks like in code:
$questions = $questionRepository->findBy([], ['created' => 'DESC']);
This will give us an array of Question entity objects. Now we need to pass it to our template file. Right now our call to the render function looks like this:
return $this->render('main/index.html.twig', [
   'controller_name' => 'MainController',
]);
We can remove the controller_name element in the array since it’s not being used and replace it with ‘questions’ => $questions. After doing that your index function should look like this:
public function index(QuestionRepository $questionRepository)
{

   $questions = $questionRepository->findBy([], ['created' => 'DESC']);

   return $this->render('main/index.html.twig', [
	   'questions' => $questions,
   ]);
}
Next let’s display them on our template! Open the templates/main/index.html.twig file. Right now we have this placeholder for where we can show questions:
<div class="card mb-3">
   <div class="card-body bg-light">
	   <div class="row">
		   <div class="col">
			   <div class="row">
				   <div class="col-6 text-center">
					   0
					   <br>
					   <small>answers</small>
				   </div>
				   <div class="col-6 text-center">
					   0
					   <br>
					   <small>views</small>
				   </div>
			   </div>
		   </div>
		   <div class="col-10">
			   <h5 class="card-title"><a href="#">[Question Title Placeholder]</a></h5>
			   <p class="card-text text-muted small">asked by [User Placeholder] [Post Time Placeholder]</p>
		   </div>
	   </div>
   </div>
</div>
Essentially what we need to do is loop through our questions array and use the actual question data instead of the placeholder text. To use a for loop in Twig, you do this:
{% for item in items %}
    {{ item }}
{% endfor %}
That would loop through an array with the name items and let you refer to each element as item in between the for loop block. One other thing you can do is add an else clause before the endfor. The else block is executed when there is nothing to loop through. Here’s what that looks like:
{% for item in items %}
    {{ item }}
{% else %}
    No items found
{% endfor %}
Now that we know that, let’s use a for loop with our questions array. For now, we’ll leave the answers count as a hardcoded 0 since we haven’t added that yet. But the other placeholders are all ok to show.
One other thing you may have trouble with is creating the link to the question page. To generate the link, we’re still going to be using the path function like we’ve been doing. But this time we need to pass it the id as a parameter. To do that you’d call the path function like you normally do and pass the route name as the first parameter. Then in the second parameter you pass it the id in { key: value } form. So in our case it would be: { ‘id’: question.id }.
If you can, try updating the homepage code on your own. If you need a reminder on how to use variables with Twig, take a look at our templates/question/index.html.twig file. We are going to be doing something pretty similar to that with the homepage.
Here’s my code:
{% for question in questions %}
   <div class="card mb-3">
	   <div class="card-body bg-light">
		   <div class="row">
			   <div class="col">
				   <div class="row">
					   <div class="col-6 text-center">
						   0
						   <br>
						   <small>answers</small>
					   </div>
					   <div class="col-6 text-center">
						   {{ question.views }}
						   <br>
						   <small>views</small>
					   </div>
				   </div>
			   </div>
			   <div class="col-10">
				   <h5 class="card-title"><a href="{{ path('app_question', { 'id': question.id }) }}">{{ question.question }}</a></h5>
				   <p class="card-text text-muted small">asked by {{ question.user.email }}  {{ question.created|date("m/d/Y h:i a") }}</p>
			   </div>
		   </div>
	   </div>
   </div>
{% else %}
   <div class="text-center alert alert-primary">No questions posted!</div>
{% endfor %}
Depending on how many questions you’ve tested out here’s what your home page should look like after making this update:

Pretty cool! You should be able to click on each of the questions and be taken to their main question page. Next let’s work on having the view count increase!
Increasing the view count
We’ll update the view count in the index function of our QuestionController.php file. Just before the return statement, we need to add 1 to the question’s view count, then we need to do the same thing we did with saving a new question. We need to use an entity manager and persist and flush the question. If you can, try writing that code on your own, then compare it to my code below:
public function index(Question $question)
{
   $question->setViews($question->getViews() + 1);
   $entityManager = $this->getDoctrine()->getManager();
   $entityManager->persist($question);
   $entityManager->flush();

   return $this->render('question/index.html.twig', [
	   'question' => $question,
   ]);
}
Now if you click on one of the questions on your homepage, then go back to your homepage and the view count should increase by one! If you pressed the back button in your browser, you may need to refresh to see the count go up.
Great! Now let’s get to answering our questions.
Answer Entity
In order to answer questions, we need to make another entity that will hold answers. So, like we did with the Question entity, let’s use the command line to make one:
php bin/console make:entity
For the name of the entity, call it Answer.
The first property we’ll add is body, which will be similar to the question body except this will hold the actual answer. For field type, it will be text and we’re going to say no to it being null since if you’re answering a question, it’s always going to have text here.
Next we’ll add a user property that will hold the user answering the question. This will be a special relation type, just like the one in the Question entity. It should relate to the User entity and it will be a ManyToOne. One Answer relates to one User and a User can have many Answers. The Answer.user property should not be null and respond yes to adding new properties to the User object to access Answer objects. Use “answers” as the field to be added to the User entity. Respond yes to the orphanRemoval question. Any time an answer doesn’t have a user it will be deleted for us automatically.
Next we’ll add a question property. This will also be a relation and will relate to the Question entity. Just like the user relation, it’s a ManyToOne. Each Answer has one Question and a Question can have many Answers. The Answer.question field should not be null. Respond yes to adding a property to the Question entity that lets us access Answer entities and use “answers” as the field name. Respond yes to orphanRemoval as well.
Lastly we’ll add a created property which will be used just like the created field on our Question entity. It’s type will be datetime and it should not be null.
And those are all our Answer entity fields. If you look in your Entity and Repository folders you’ll see the new Answer.php and AnswerRepository.php files. If you take a look at the User and Question entity you should also see they were updated to have new methods and properties related to answers.
Now we need to modify our Answer entity a little before we can run a migration and update our database. The main thing being setting up the created property to use today’s date as the date it saves in the database.
For the Question entity we set the default value in the annotation and then also had to manually set it whenever we saved. For this one, just to show you a different way of doing it we’ll do it slightly different. For the Answer entity we’ll set the created date in the constructor. The constructor isn’t auto-generated for us so we’ll need to create a __construct function ourselves. Then inside, set $this->created equal to new \DateTime(). Here’s what that looks like:
public function __construct()
{
   $this->created = new \DateTime();
}
This will now set the created property for us whenever a new Answer entity is created. It won’t affect already existing Answer entities because after the constructor is called, Doctrine will overwrite it with the existing created value.
Setting up the created property this way helps us in that we don’t need to set it whenever we go to save a new Answer entity like we did with the Question entity.
With that out of the way, let’s create our migration and run it. In your terminal type the following commands:
php bin/console make:migration
php bin/console doctrine:migrations:migrate
And then your answer table should be created! Now let’s create a form to answer questions.
Answer Form
Like we did with the Question form, we’re going use the command line tool to set it up for us and then tweak it so it does what we want. So, in your terminal type:
php bin/console make:form
For the name put AnswerType and the entity is Answer.
The src/Form folder should now have an AnswerType.php file. Open that and we’ll get started with our modifications. We’ll just be editing the buildForm method like we did with the QuestionType form.
We only need the body field, the others are all either already set for us (created) or we need to set through code (user and question). After removing the fields we don’t need, our buildForm function should look like this:
public function buildForm(FormBuilderInterface $builder, array $options)
{
   $builder
	   ->add('body')
   ;
}
Now we need to add some validation to the body field and also add our submit button. We saw how to do that with both the Login and Question forms so I won’t go into too much of an explanation. But essentially we need to add the NotBlank constraint to the body field. We also need to make it a TextareaType field. As always try writing the code to add the NotBlank constraint to the body field and the code to add a submit button. When your done or need help, take a look at my code below:
public function buildForm(FormBuilderInterface $builder, array $options)
{
   $builder
	   ->add('body', TextareaType::class, [
		   'constraints' => [
			   new NotBlank([
				   'message' => 'Your answer may not be blank.'
			   ])
		   ],
		   'label' => 'Your Answer'
	   ])
	   ->add('submit', SubmitType::class, [
		   'label' => 'Post Answer'
	   ])
   ;
}
You’ll need to add these use statements to use the TextareaType, NotBlank and SubmitType classes:
use Symfony\Component\Form\Extension\Core\Type\TextareaType;
use Symfony\Component\Validator\Constraints\NotBlank;
use Symfony\Component\Form\Extension\Core\Type\SubmitType;
This should all look a little familiar from the other forms we’ve made. We’re adding some constraints and setting labels.
Next let’s render the form on our question page.
Rendering and Processing our Form
Open the QuestionController.php file and go to the index function. Above the code that updates the view count, let’s add some code to render and process our answer form. You can peek at the askQuestion function for a hint on what you need to do. We need to create a new Answer object, use the createForm method to create an AnswerType form and then run the handleRequest method (you’ll need the Request object for this). Then we need to check if its submitted and valid and if so, save a new answer. Since this is all stuff we’ve done before I’m going to skip a lot of the explanation.
Also, when the form is submitted and valid, we need to set the user and the question before we save. The created date is already set for us in our Answer constructor. So, if your up to it, try writing out this code yourself. Again, if you’re unsure, try taking a look at the askQuestion method for some help.
Take a look at my my code when you’re done or get stuck:
public function index(Question $question, Request $request)
{

   $answer = new Answer();
   $form = $this->createForm(AnswerType::class, $answer);
   $form->handleRequest($request);

   if($form->isSubmitted() && $form->isValid())
   {
	   $answer->setUser($this->getUser());
	   $answer->setQuestion($question);
	   $entityManager = $this->getDoctrine()->getManager();
	   $entityManager->persist($answer);
	   $entityManager->flush();
	   return $this->redirectToRoute("app_question", ['id' => $question->getId()]);
   }


   $question->setViews($question->getViews() + 1);
   $entityManager = $this->getDoctrine()->getManager();
   $entityManager->persist($question);
   $entityManager->flush();

   return $this->render('question/index.html.twig', [
	   'question' => $question,
	   'answerForm' => $form->createView()
   ]);
}
This should all look pretty familiar to you at this point. After we save, we’re redirecting back to the question page so we don’t get the issue where if someone refreshes it saves the answer again. There is one important thing we are missing from the above code though. Answering a question requires a user to be logged in. So, what we need to do is wrap this Answer code around an if statement and check if there is a logged in user. We did something like this in our SecurityController. Using the $this->isGranted method we checked if a user was authenticated and if so, we redirected to the home page. We can use that method in our QuestionController to prevent an Answer from being saved if there is no logged in user.
Here’s the code for that:
if($this->isGranted("IS_AUTHENTICATED_FULLY"))
{
   $answer = new Answer();
   $form = $this->createForm(AnswerType::class, $answer);
   $form->handleRequest($request);

   if($form->isSubmitted() && $form->isValid())
   {
	   $answer->setUser($this->getUser());
	   $answer->setQuestion($question);
	   $entityManager = $this->getDoctrine()->getManager();
	   $entityManager->persist($answer);
	   $entityManager->flush();
	   return $this->redirectToRoute("app_question", ['id' => $question->getId()]);
   }
}
One other thing we need to do is not render the Answer form if there is no logged in user. There’s a bunch of ways we can do this. I’m going to create a $renderedForm variable above our logged in check and set it to null. Then inside the if statement I’ll set it equal to $form->createView(). Here’s my code after making that change:
public function index(Question $question, Request $request)
{

   $renderedForm = null;
   if($this->isGranted("IS_AUTHENTICATED_FULLY"))
   {
	   $answer = new Answer();
	   $form = $this->createForm(AnswerType::class, $answer);
	   $form->handleRequest($request);

	   if($form->isSubmitted() && $form->isValid())
	   {
		   $answer->setUser($this->getUser());
		   $answer->setQuestion($question);
		   $entityManager = $this->getDoctrine()->getManager();
		   $entityManager->persist($answer);
		   $entityManager->flush();
		   return $this->redirectToRoute("app_question", ['id' => $question->getId()]);
	   }

	   $renderedForm = $form->createView();
   }

   $question->setViews($question->getViews() + 1);
   $entityManager = $this->getDoctrine()->getManager();
   $entityManager->persist($question);
   $entityManager->flush();

   return $this->render('question/index.html.twig', [
	   'question' => $question,
	   'answerForm' => $renderedForm
   ]);
}
One final change we should make is moving the $entityManager variable outside of the if statement. Since we’re also going to need an $entityManager for increasing the view count, it’s better to just have one of those. Here’s the final code for our index method:
public function index(Question $question, Request $request)
{
   $entityManager = $this->getDoctrine()->getManager();
   $renderedForm = null;
   if($this->isGranted("IS_AUTHENTICATED_FULLY"))
   {
	   $answer = new Answer();
	   $form = $this->createForm(AnswerType::class, $answer);
	   $form->handleRequest($request);

	   if($form->isSubmitted() && $form->isValid())
	   {
		   $answer->setUser($this->getUser());
		   $answer->setQuestion($question);

		   $entityManager->persist($answer);
		   $entityManager->flush();
		   return $this->redirectToRoute("app_question", ['id' => $question->getId()]);
	   }

	   $renderedForm = $form->createView();
   }

   $question->setViews($question->getViews() + 1);

   $entityManager->persist($question);
   $entityManager->flush();

   return $this->render('question/index.html.twig', [
	   'question' => $question,
	   'answerForm' => $renderedForm
   ]);
}
You’ll need to add these use statements to the top of your file to use the new classes we’re using for the form code:
use App\Entity\Answer;
use App\Form\AnswerType;
Great! Now let’s go back to the question/index.html.twig template file and add the code to show the answer form!
Displaying the Form
We’re going to display the form like we did with our Ask Question form: form(answerForm). First we need to check if there is a form, since non-logged in users can view the question page, and then display it. We’ll put it towards the bottom of our body block. If you can, code this out on your own. You’ll probably want to put it around some bootstrap styling but if you’re not sure about that it’s fine.
Here’s how I did it:
 {% if answerForm %}
   <hr>
   <div class="row">
	   <div class="col-8 offset-2">
		   {{ form(answerForm) }}
	   </div>
   </div>
{% endif %}
Here’s my full template code if you want to check where that goes:
{% extends 'base.html.twig' %}

{% block title %}View Question{% endblock %}

{% block body %}
   <h3 class="text-center"> {{ question.question }}</h3>

   {% if question.body %}
   <div class="row">
       <div class="col-8 offset-2">
       <div class="card">
           <div class="card-body">
               <p class="card-text">{{ question.body }}</p>
           </div>
           <div class="card-footer text-muted small">
               {{ question.created|date("m/d/Y h:i a") }}
           </div>
       </div>
       </div>
   </div>
   {% endif %}

   {% if answerForm %}
       <hr>
       <div class="row">
           <div class="col-8 offset-2">
               {{ form(answerForm) }}
           </div>
       </div>
   {% endif %}

{% endblock %}
With that change, your question page should look like this:
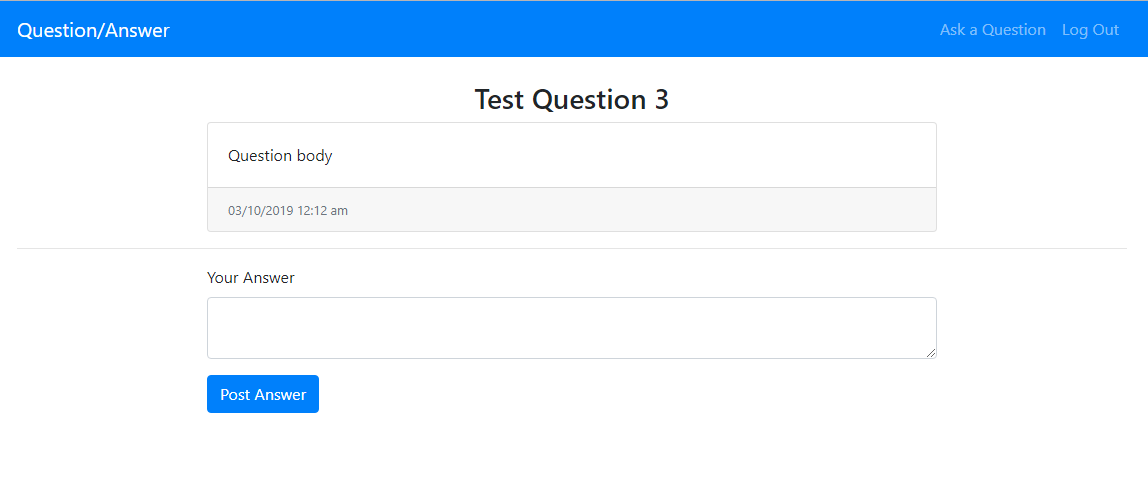
Nice! Our question page is starting to come together. Now let’s test out the form. If you put an answer and submit… nothing happens or does it? If you check your database, there should be a record in the answer table. So now we just need to display answers on our question page!
Displaying Answers
To show answers we can use the question object that we already have access to in our template. When we added the $answers property to our Question entity, we gave ourselves access to any answers related to that question. So, we’ll check if there are any answers, then loop through the question.answers array to pull any answers for the question we’re on. We can use the same html to display our answers that we’re using to display the question. The one other thing we should do is display the user who answered the question. We can do that where we’re showing the created date.
As always, if you can, try writing that code on your own. Here’s my code:
{% if question.answers %}
   <hr>
   <h4 class="text-center">Answers</h4>
   <div class="row">
	   <div class="col-8 offset-2">
		   {% for answer in question.answers %}
		   <div class="card">
			   <div class="card-body">
				   <p class="card-text">{{ answer.body }}</p>
			   </div>
			   <div class="card-footer text-muted small">
				   {{ answer.user.email }} - {{ answer.created|date("m/d/Y h:i a") }}
			   </div>
		   </div>
		   {% endfor %}
	   </div>
   </div>
{% endif %}
The only other thing I added that I didn’t mention above was I separated the section with an hr and added an h4 to show that this part of the page was for answers.
Here’s the full template code:
{% extends 'base.html.twig' %}

{% block title %}View Question{% endblock %}

{% block body %}
   <h3 class="text-center"> {{ question.question }}</h3>

   {% if question.body %}
   <div class="row">
       <div class="col-8 offset-2">
           <div class="card">
               <div class="card-body">
                   <p class="card-text">{{ question.body }}</p>
               </div>
               <div class="card-footer text-muted small">
                   {{ question.created|date("m/d/Y h:i a") }}
               </div>
           </div>
       </div>
   </div>
   {% endif %}

   {% if question.answers %}
       <hr>
       <h4 class="text-center">Answers</h4>
       <div class="row">
           <div class="col-8 offset-2">
               {% for answer in question.answers %}
               <div class="card">
                   <div class="card-body">
                       <p class="card-text">{{ answer.body }}</p>
                   </div>
                   <div class="card-footer text-muted small">
                       {{ answer.user.email }} - {{ answer.created|date("m/d/Y h:i a") }}
                   </div>
               </div>
               {% endfor %}
           </div>
       </div>
   {% endif %}

   {% if answerForm %}
       <hr>
       <div class="row">
           <div class="col-8 offset-2">
               {{ form(answerForm) }}
           </div>
       </div>
   {% endif %}

{% endblock %}
Your page should look something like this now:
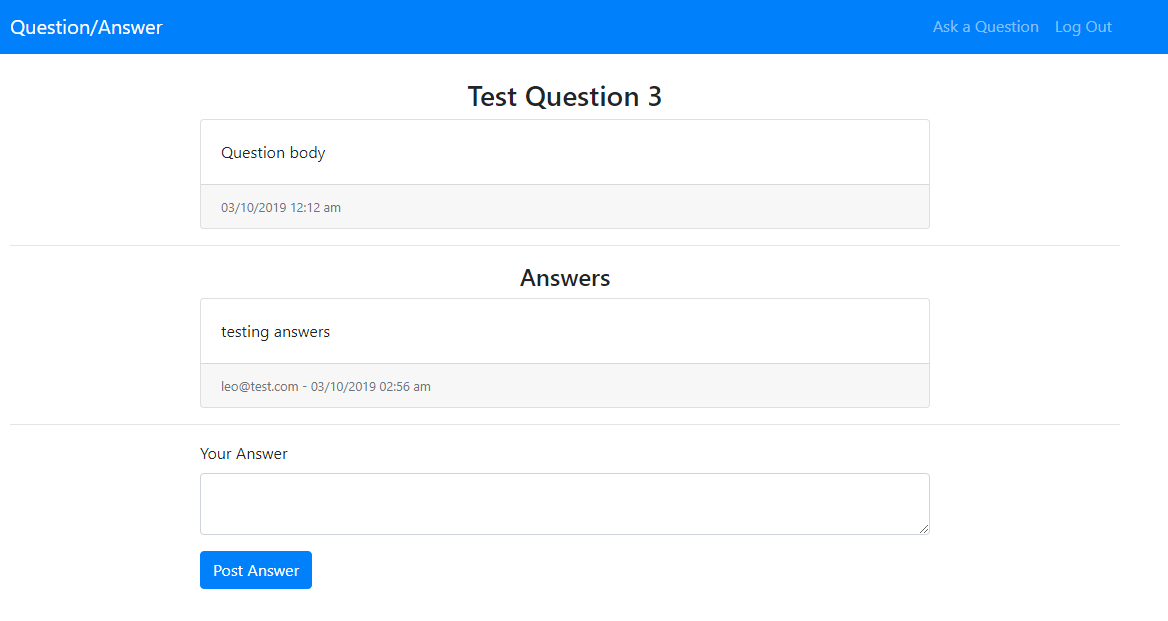
We’re pretty much set on this page and we’re also almost finished with our app! There’s a few more adjustments I want to make.
Showing the Answer Count
Back at the beginning of this tutorial we updated the homepage to show each question, but we left the answer count as a hardcoded 0. Let’s fix that to pull the real count. So, open the templates/main/index.html.twig file. We’re going to replace that 0 with the following:
{{ question.answers|length }}
The length filter essentially gets us the amount of elements in an array. In PHP it’s just like the count function. Now if you refresh the homepage, your answer count should show the actual answer count.
Great! However, this isn’t that efficient query-wise. Whenever we pull the answers from the Question entity, it’s going to pull all of the the full Answer entities. It would be better if we just pulled a count. You can actually see the queries that are running if you click on the database icon in our debug toolbar. It’s the one that looks like this:
![]()
On that page you’ll see something like this:
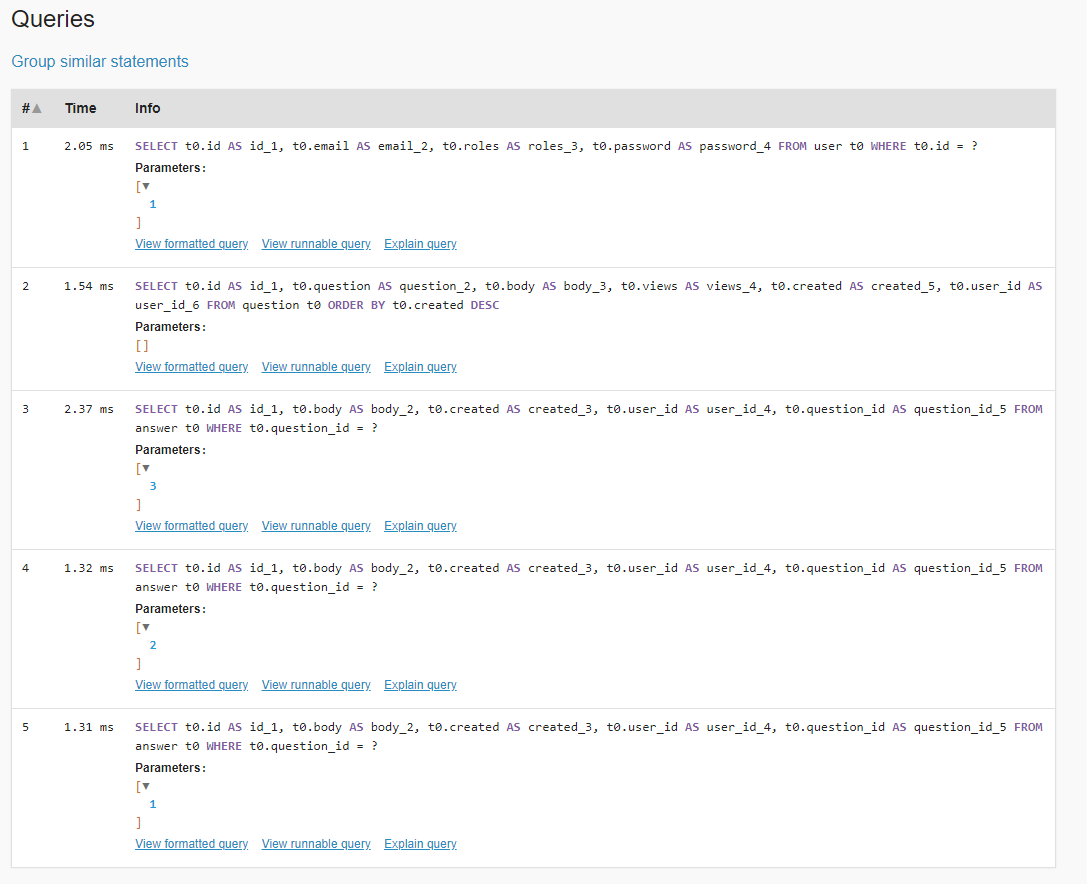
This shows all the database queries that have been run to build our page. It’s pretty handy to see if there are any inefficiencies in your queries. But you can see, the first query pulls the user information, the 2nd pulls all of the questions and then the next three pull all the answers from each of the questions. Depending on the amount of questions you have, this page may have more or less queries.
Now, to make it so it isn’t always pulling all of the Answer entities, we need to update our Question entity. In the $answer property’s annotation:
 /**
  * @ORM\OneToMany(targetEntity="App\Entity\Answer", mappedBy="question", orphanRemoval=true)
  */
We need to add an extra parameter called fetch and set it equal to “EXTRA_LAZY”. Here’s what it should look like:
 /**
  * @ORM\OneToMany(targetEntity="App\Entity\Answer", mappedBy="question", orphanRemoval=true, fetch="EXTRA_LAZY")
  */
Essentially this lazy loads the answers. So, if we never try to access one of the properties on an answer, it won’t run the full query to pull all the answers. When we run answers through the length filter in our template, it will instead run a count query. After saving your Question entity, head back to your homepage and refresh.
If you click on the database icon again, your queries page should now look something like this:
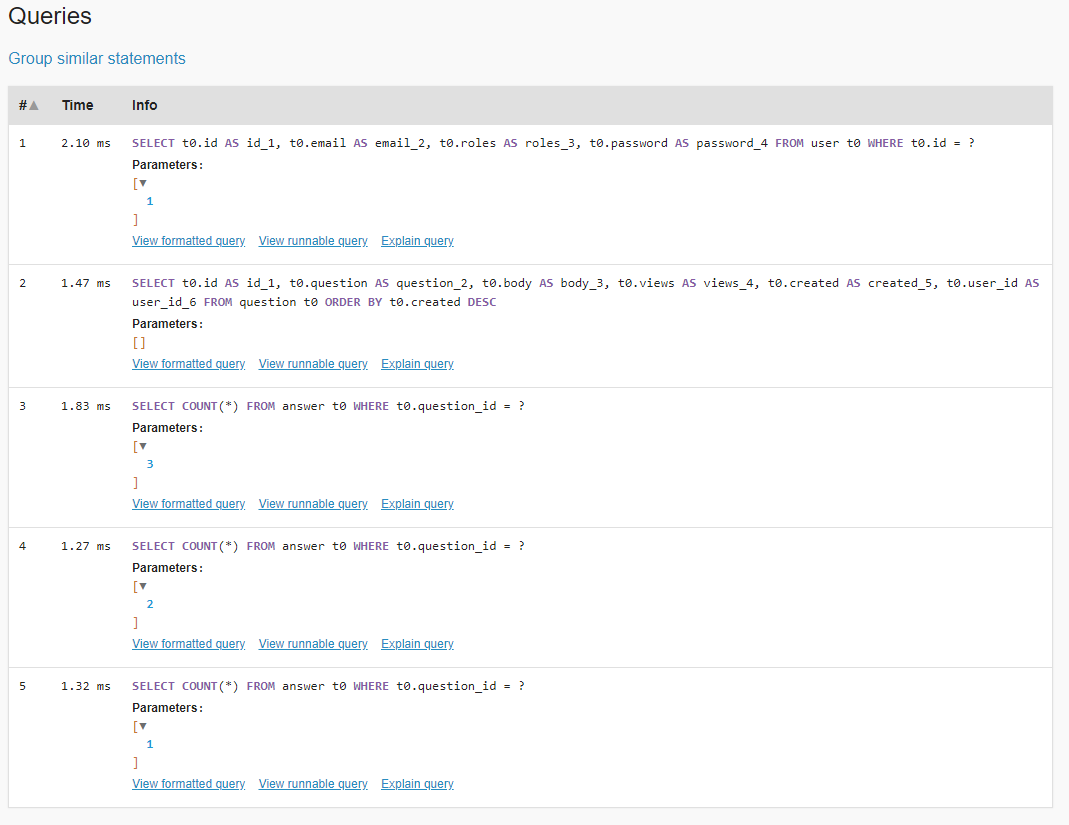
The first two queries are the same, but now the queries that are pulling the answers were changed to count queries.
And with that, we’ve completed our project! Now, this isn’t the most advanced website, but hopefully you were able to take away enough from this tutorial to start more complex tutorials and maybe even try building something on your own.
Here’s a link to the full code if you want to check it against your own: Download Code
If you have any questions or feedback feel free to leave a comment below!